
今天我参加了一次代码评审,结果领导看到了我本地代码的控制台,被我花里胡哨的console 打印内容给吸引住了!竟然还说我这东西有意思,花里胡哨的他可喜欢了!可是接着他又问我,这么花里胡哨的东西,上生产会不会影响性能啊?我自信满满地回答说:不会的,代码内有判断,只有在开发环境下才会打印出来!老板听后非常满意,于是要求我给其他前端同事们分享一下,说说具体实现思路!老板这么抬举,咱岂能放过装杯机会,哈哈。最后,这个方法还被加入公司的公用 utils 库里,供大家使用呢!
先来看一下效果:
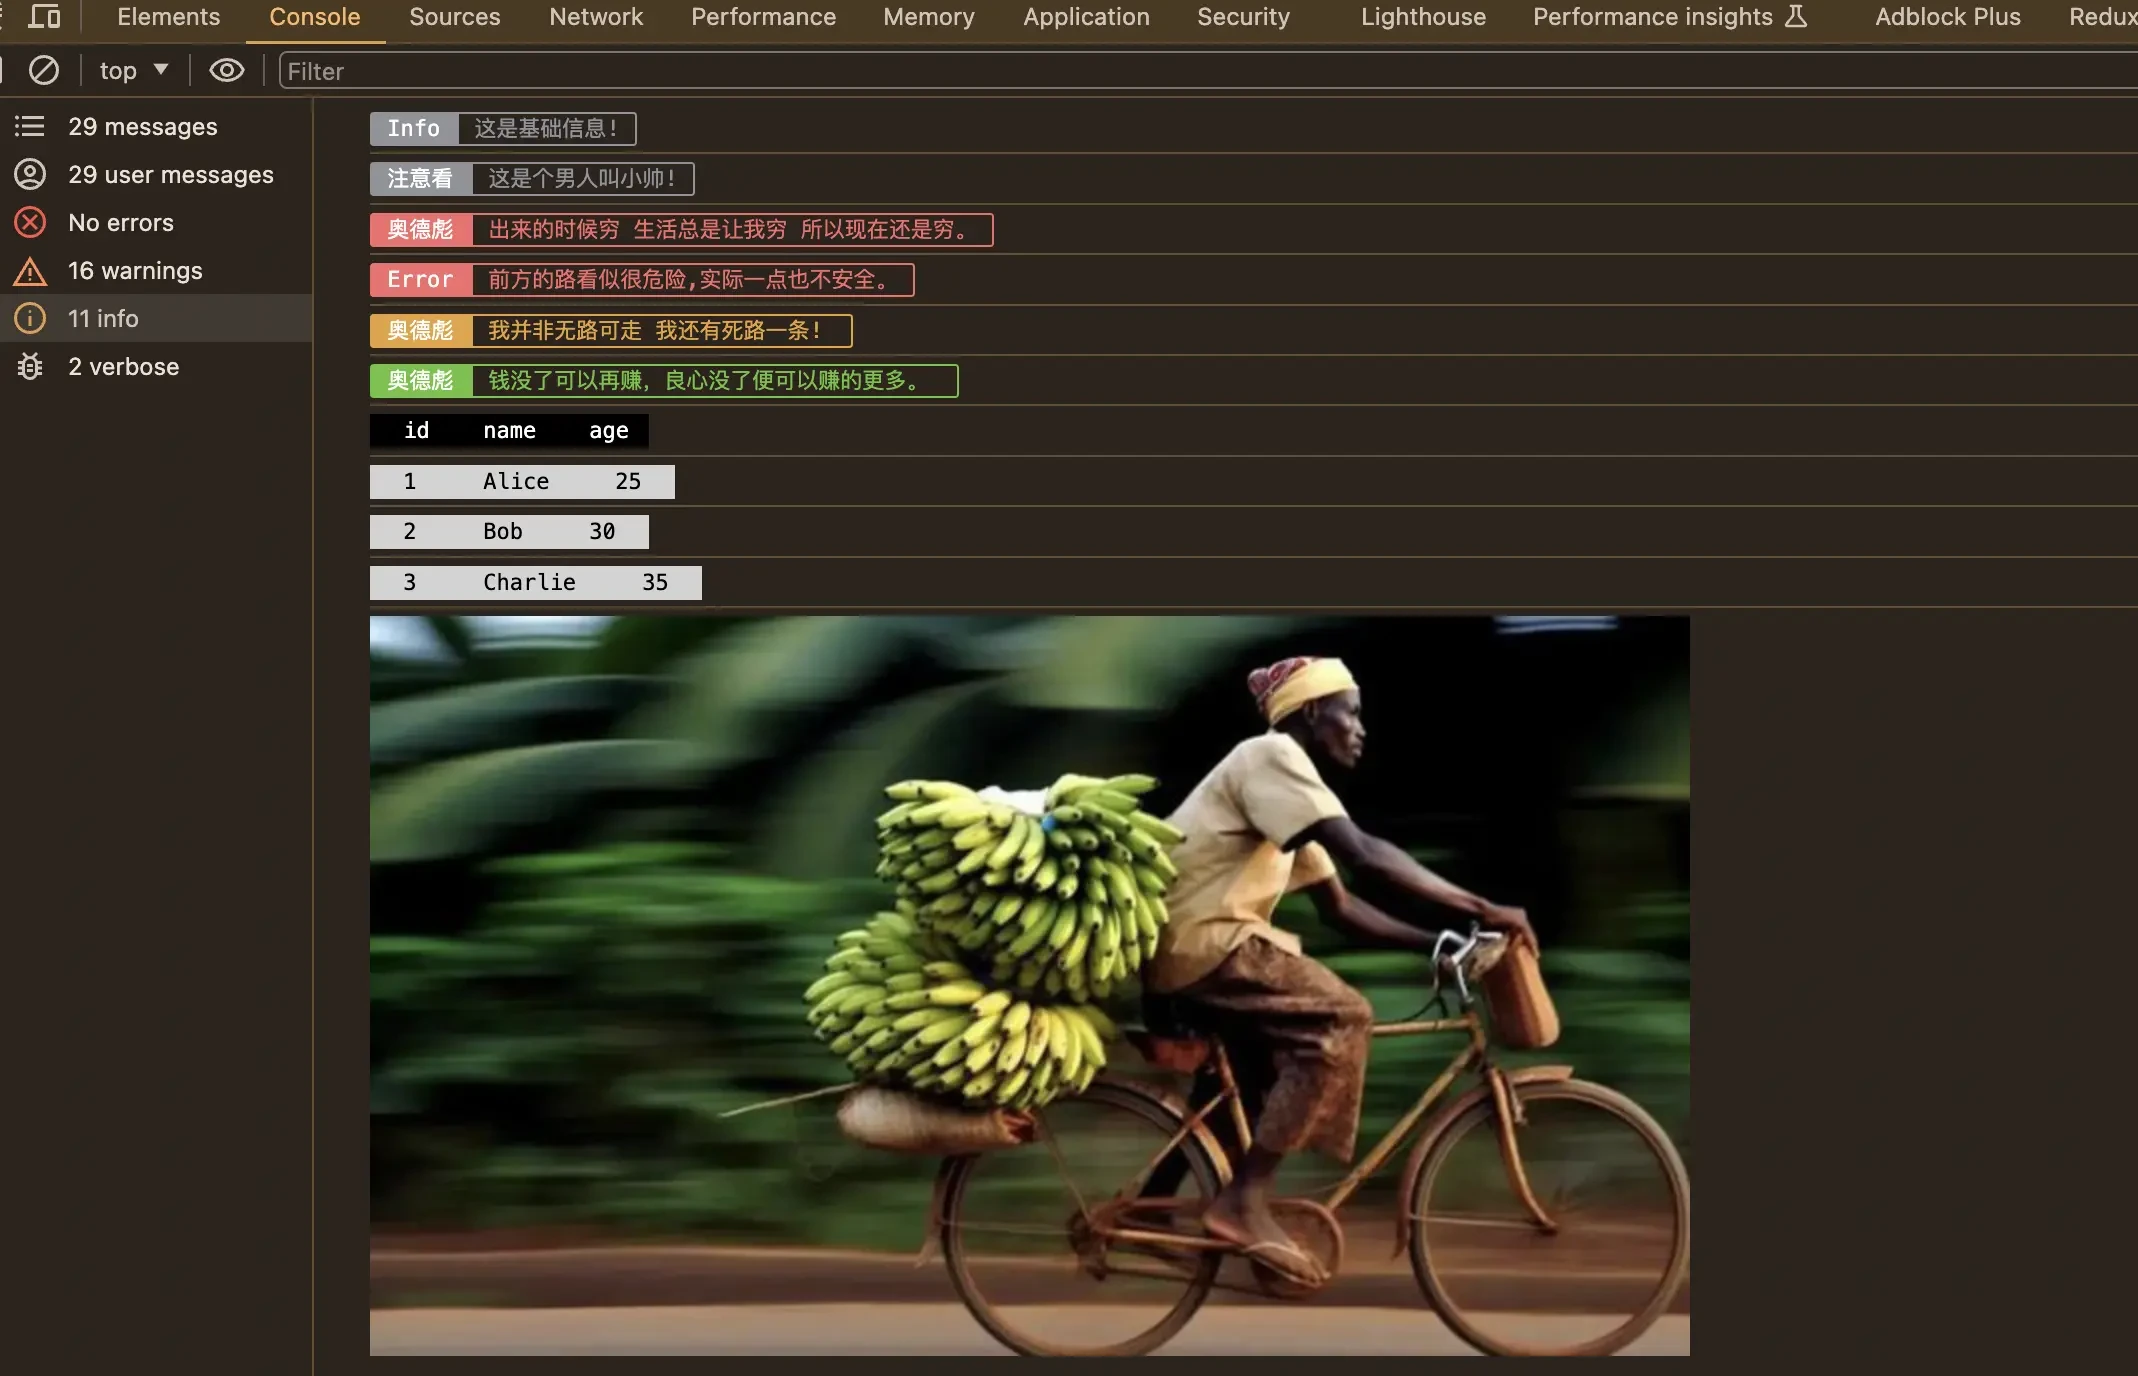
但是,我们无法控制表格的宽度,因此,这个方法不太好用,不如原生。
仅在开发环境使用
// 美化打印实现方法
const prettyLog = () => {
  //判断是否生产环境
  const isProduction = import.meta.env.MODE === 'production';

  const isEmpty = (value: any) => {
    return value == null || value === undefined || value === '';
  };
  const prettyPrint = (title: string, text: string, color: string) => {
    if (isProduction) return;
    // ...
  };
  // ...
  const picture = (url: string, scale = 1) => {
    if (isProduction) return;
    // ...
    };

    // retu;
    return {
        info,
        error,
        warning,
        success,
        picture,
        table
    };
};
我们可以通过import.meta.env.MODE判断当前环境是否为生产环境,在生产环境,我们可以禁用信息打印!
完整代码
// 美化打印实现方法
const prettyLog = () => {
    const isProduction = import.meta.env.MODE === 'production';

    const isEmpty = (value: any) => {
        return value == null || value === undefined || value === '';
    };
    const prettyPrint = (title: string, text: string, color: string) => {
        if (isProduction) return;
        console.log(
            `%c ${title} %c ${text} %c`,
            `background:${color};border:1px solid ${color}; padding: 1px; border-radius: 2px 0 0 2px; color: #fff;`,
            `border:1px solid ${color}; padding: 1px; border-radius: 0 2px 2px 0; color: ${color};`,
            'background:transparent'
        );
    };
    const info = (textOrTitle: string, content = '') => {
        const title = isEmpty(content) ? 'Info' : textOrTitle;
        const text = isEmpty(content) ? textOrTitle : content;
        prettyPrint(title, text, '#909399');
    };
    const error = (textOrTitle: string, content = '') => {
        const title = isEmpty(content) ? 'Error' : textOrTitle;
        const text = isEmpty(content) ? textOrTitle : content;
        prettyPrint(title, text, '#F56C6C');
    };
    const warning = (textOrTitle: string, content = '') => {
        const title = isEmpty(content) ? 'Warning' : textOrTitle;
        const text = isEmpty(content) ? textOrTitle : content;
        prettyPrint(title, text, '#E6A23C');
    };
    const success = (textOrTitle: string, content = '') => {
        const title = isEmpty(content) ? 'Success ' : textOrTitle;
        const text = isEmpty(content) ? textOrTitle : content;
        prettyPrint(title, text, '#67C23A');
    };
    const table = () => {
        const data = [
            { id: 1, name: 'Alice', age: 25 },
            { id: 2, name: 'Bob', age: 30 },
            { id: 3, name: 'Charlie', age: 35 }
        ];
        console.log(
            '%c id%c name%c age',
            'color: white; background-color: black; padding: 2px 10px;',
            'color: white; background-color: black; padding: 2px 10px;',
            'color: white; background-color: black; padding: 2px 10px;'
        );

        data.forEach((row: any) => {
            console.log(
                `%c ${row.id} %c ${row.name} %c ${row.age} `,
                'color: black; background-color: lightgray; padding: 2px 10px;',
                'color: black; background-color: lightgray; padding: 2px 10px;',
                'color: black; background-color: lightgray; padding: 2px 10px;'
            );
        });
    };
    const picture = (url: string, scale = 1) => {
        if (isProduction) return;
        const img = new Image();
        img.crossOrigin = 'anonymous';
        img.onload = () => {
            const c = document.createElement('canvas');
            const ctx = c.getContext('2d');
            if (ctx) {
                c.width = img.width;
                c.height = img.height;
                ctx.fillStyle = 'red';
                ctx.fillRect(0, 0, c.width, c.height);
                ctx.drawImage(img, 0, 0);
                const dataUri = c.toDataURL('image/png');

                console.log(
                    `%c sup?`,
                    `font-size: 1px;
                    padding: ${Math.floor((img.height * scale) / 2)}px ${Math.floor((img.width * scale) / 2)}px;
                    background-image: url(${dataUri});
                    background-repeat: no-repeat;
                    background-size: ${img.width * scale}px ${img.height * scale}px;
                    color: transparent;
                    `
                );
            }
        };
        img.src = url;
    };

    // retu;
    return {
        info,
        error,
        warning,
        success,
        picture,
        table
    };
};
// 创建打印对象
const log = prettyLog();
至此,前端花式 console 打印就完成了,喜欢的拿去不谢,更多请关注其它相关文章!